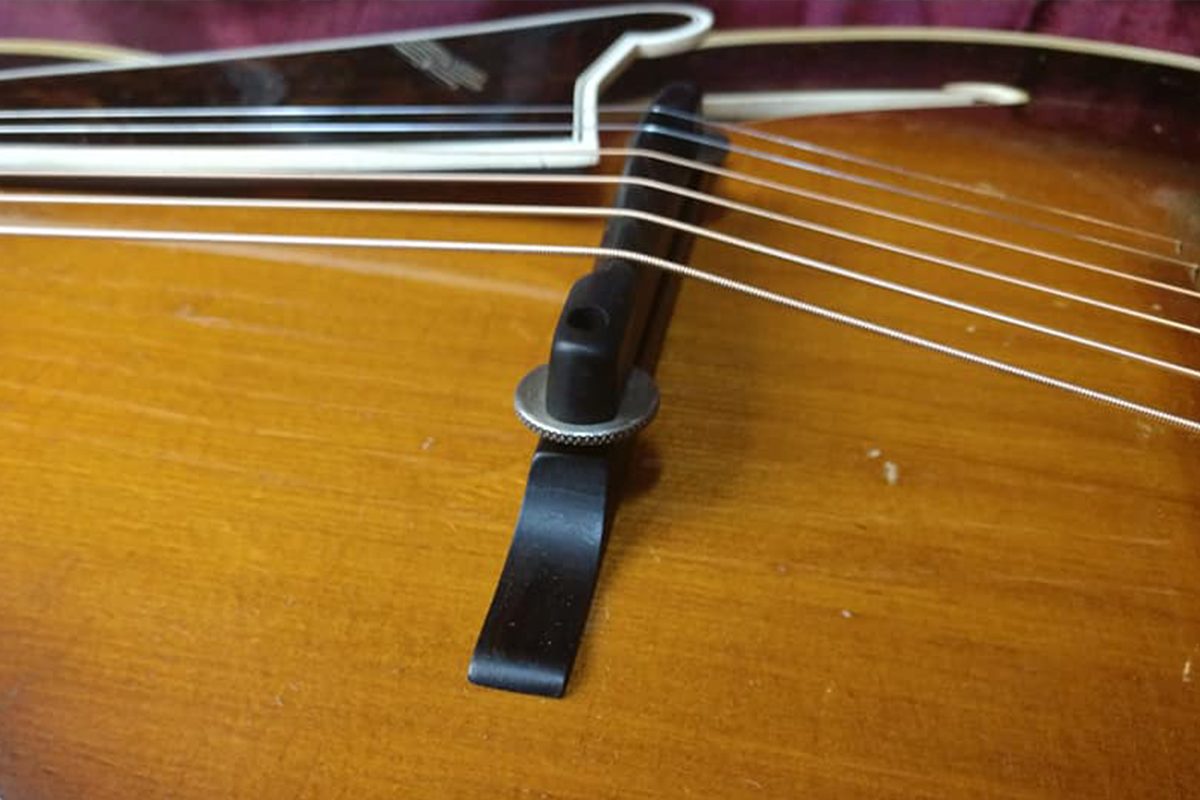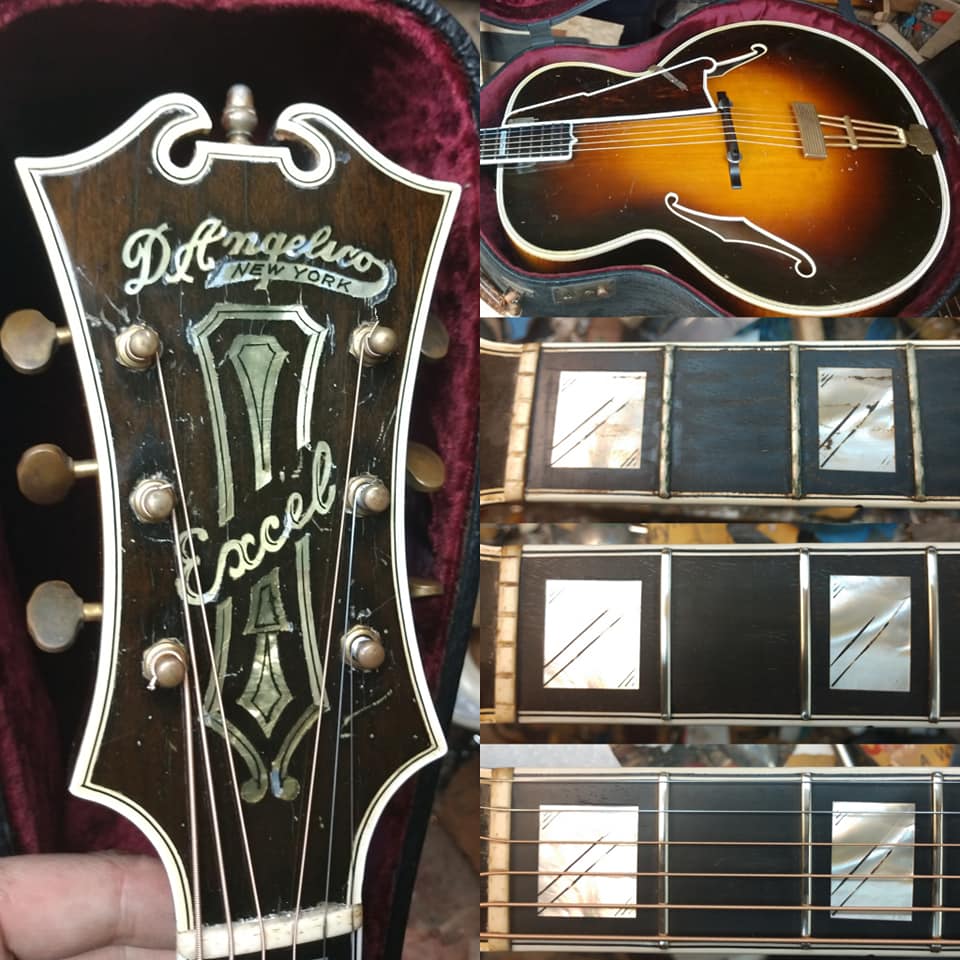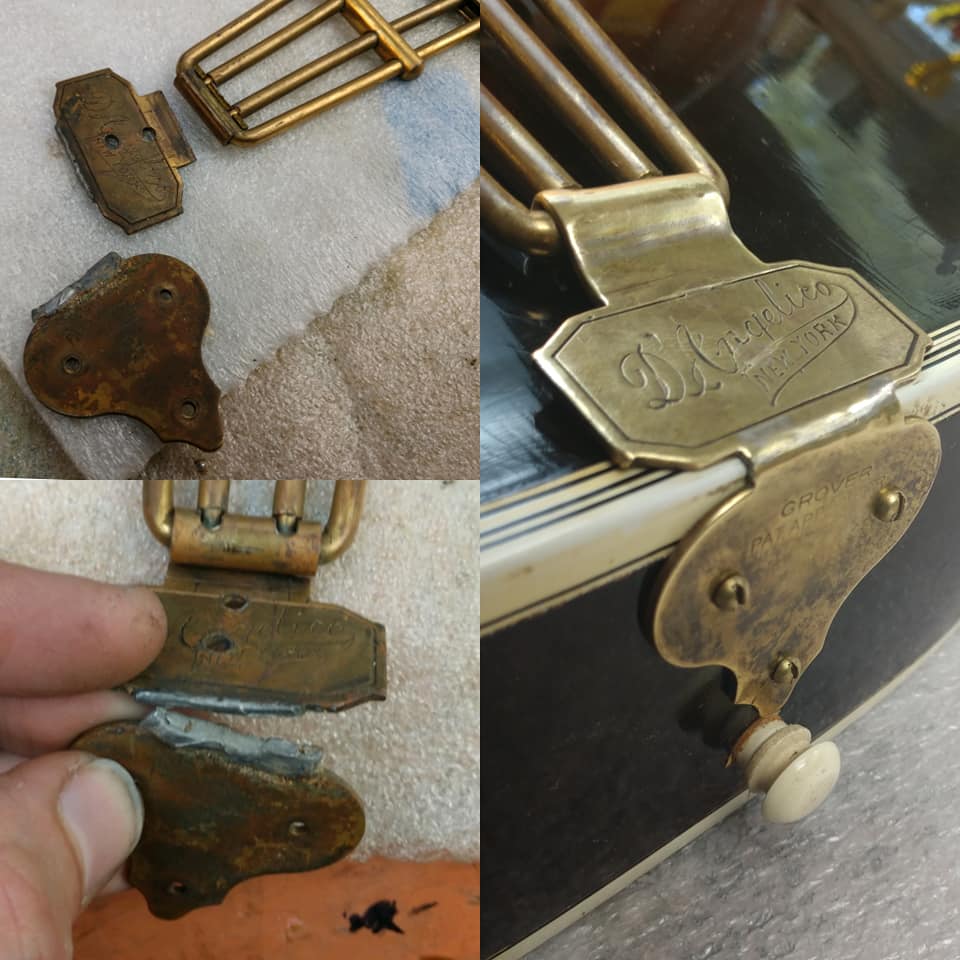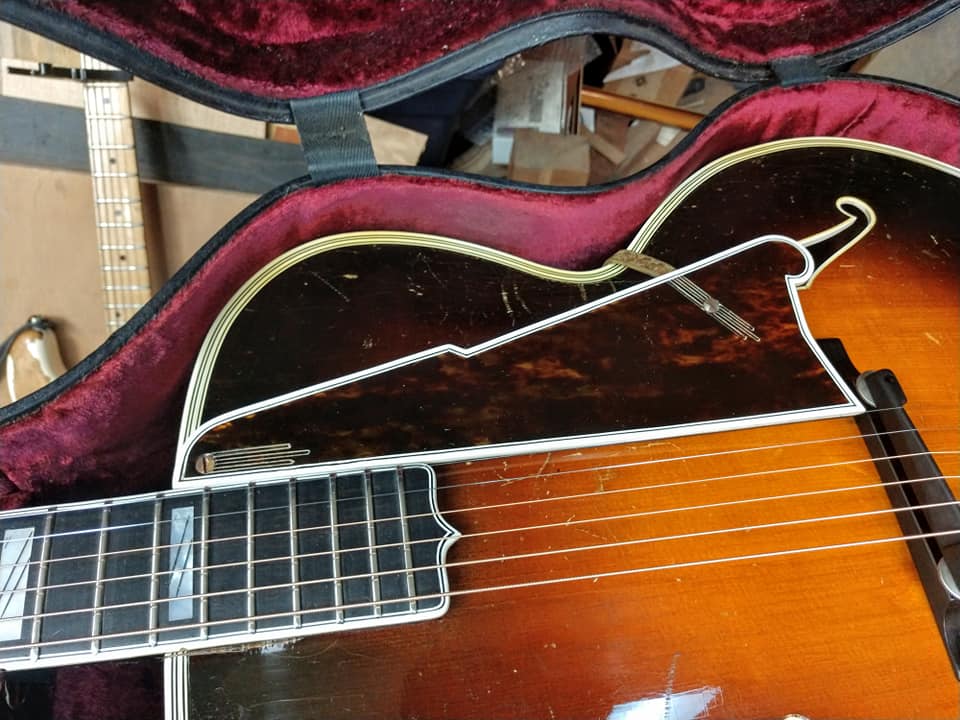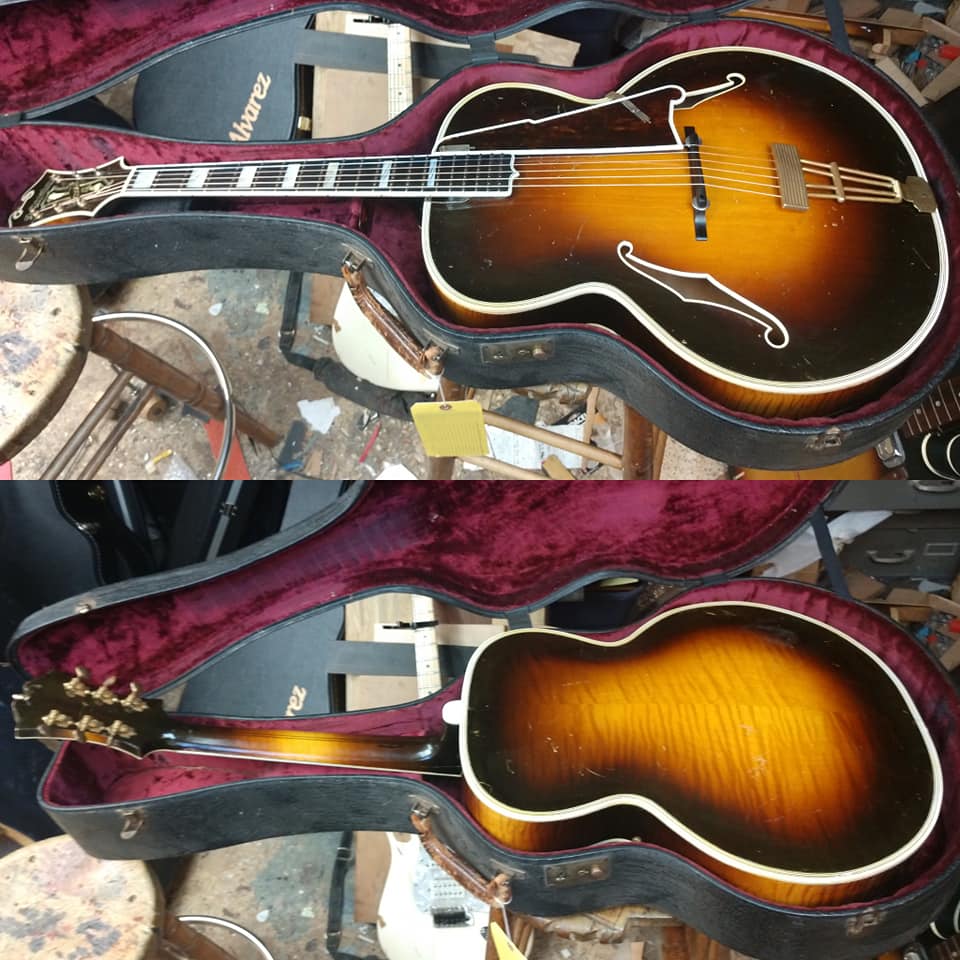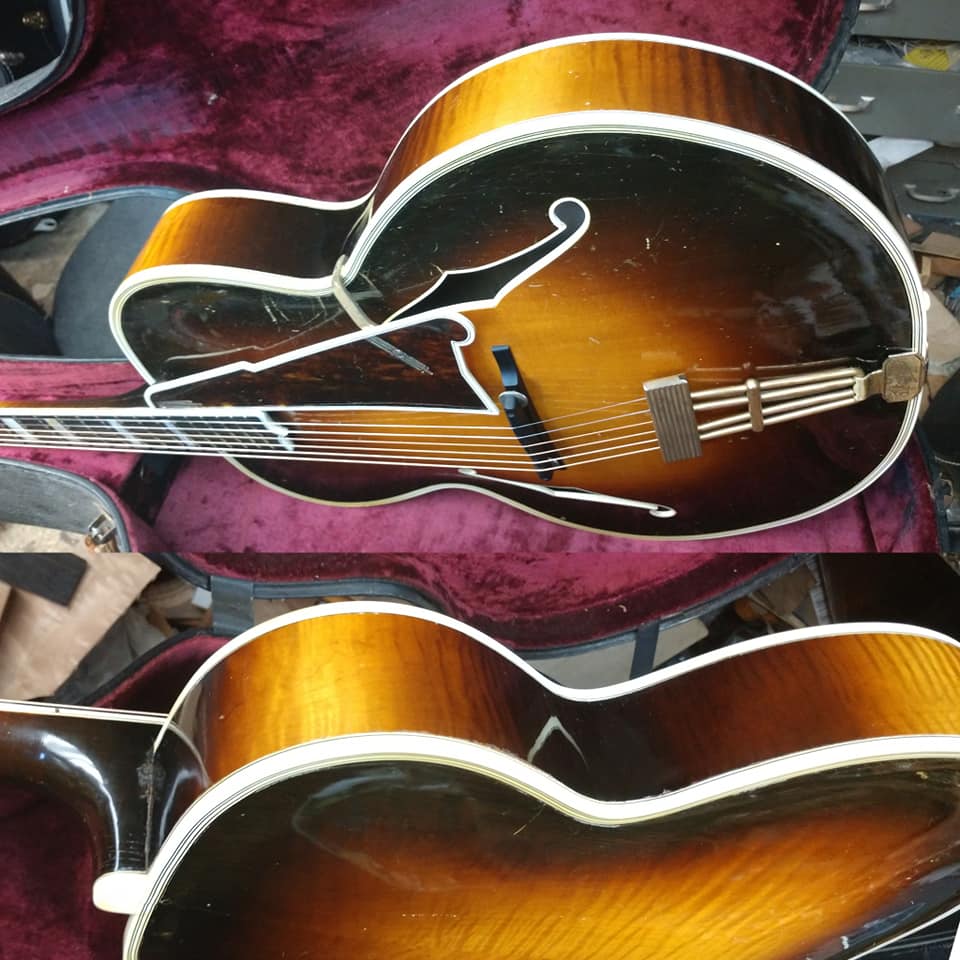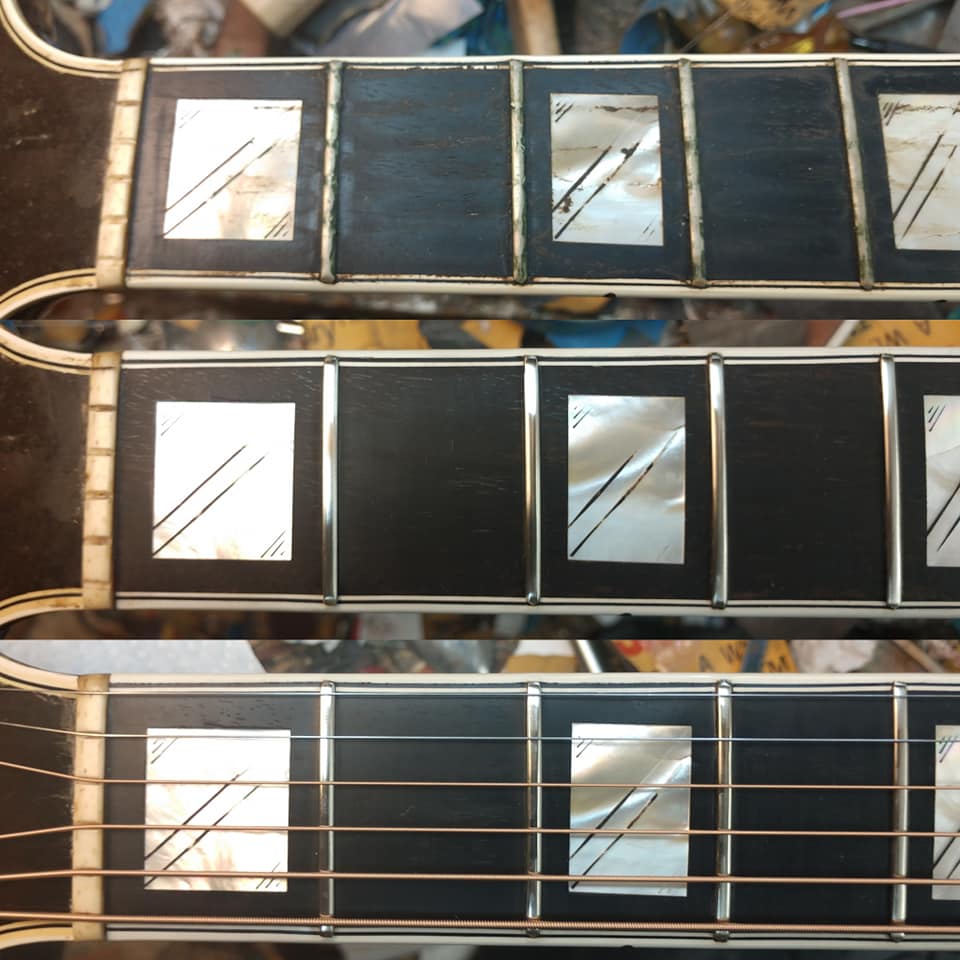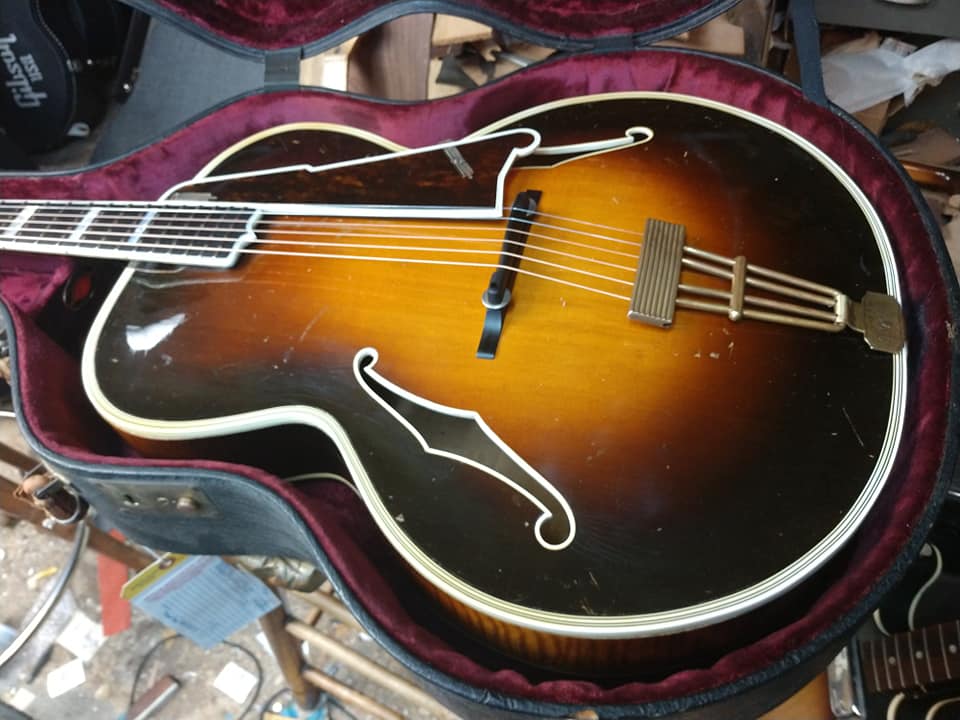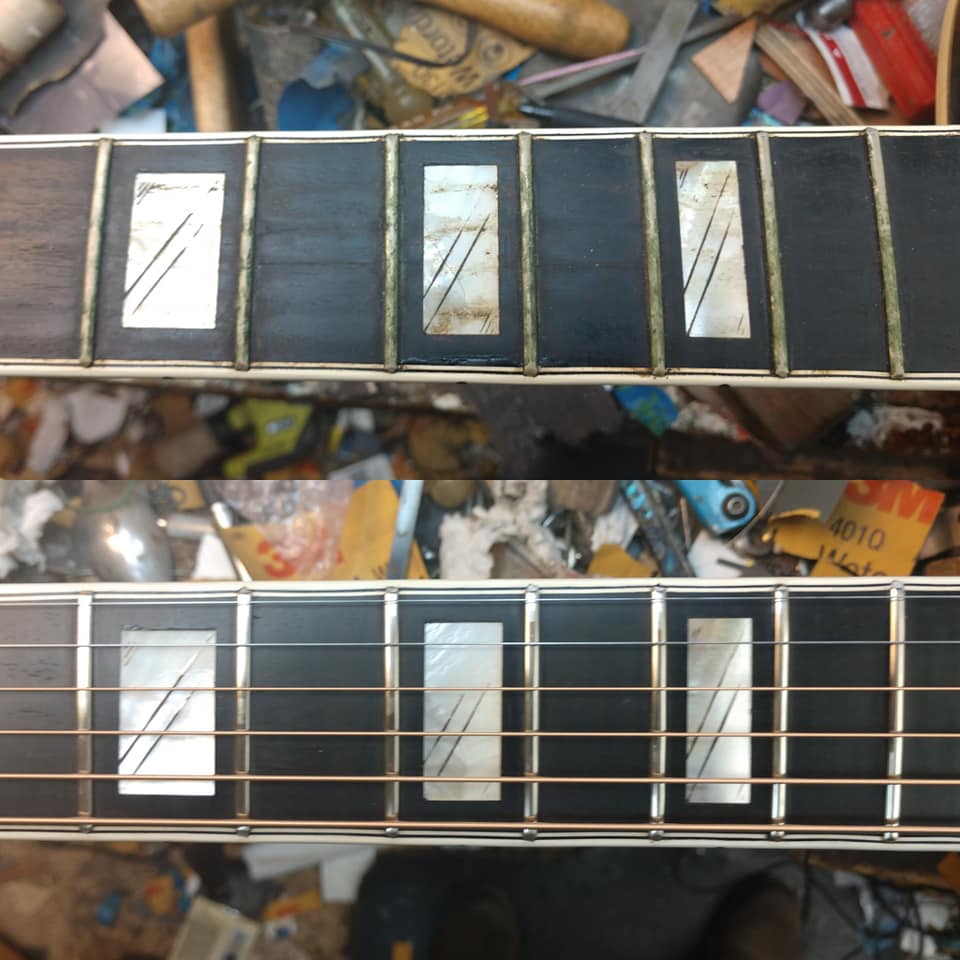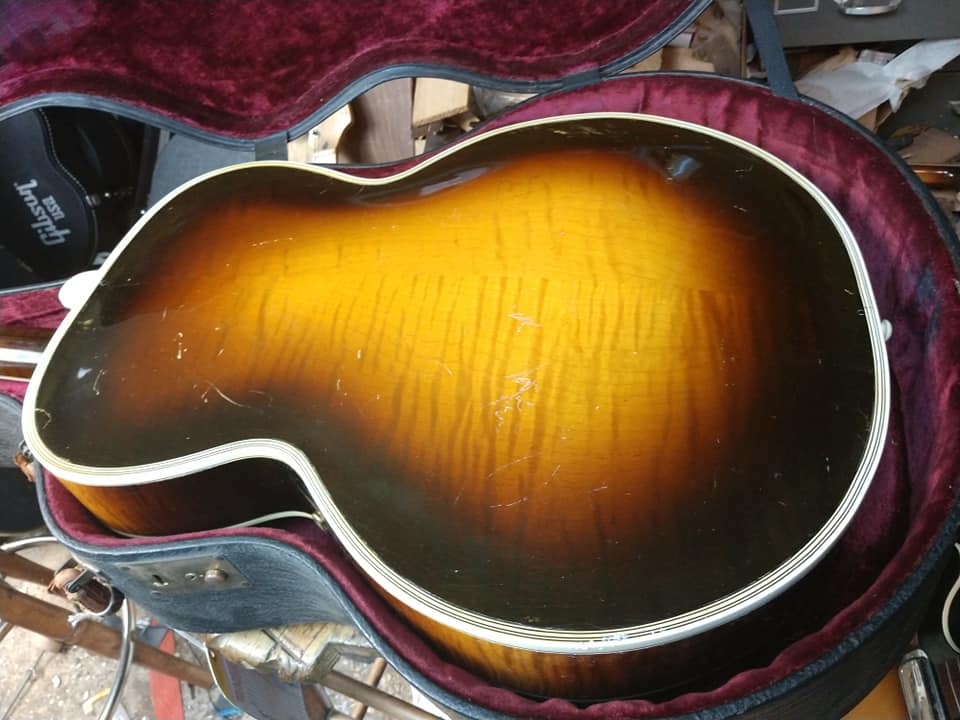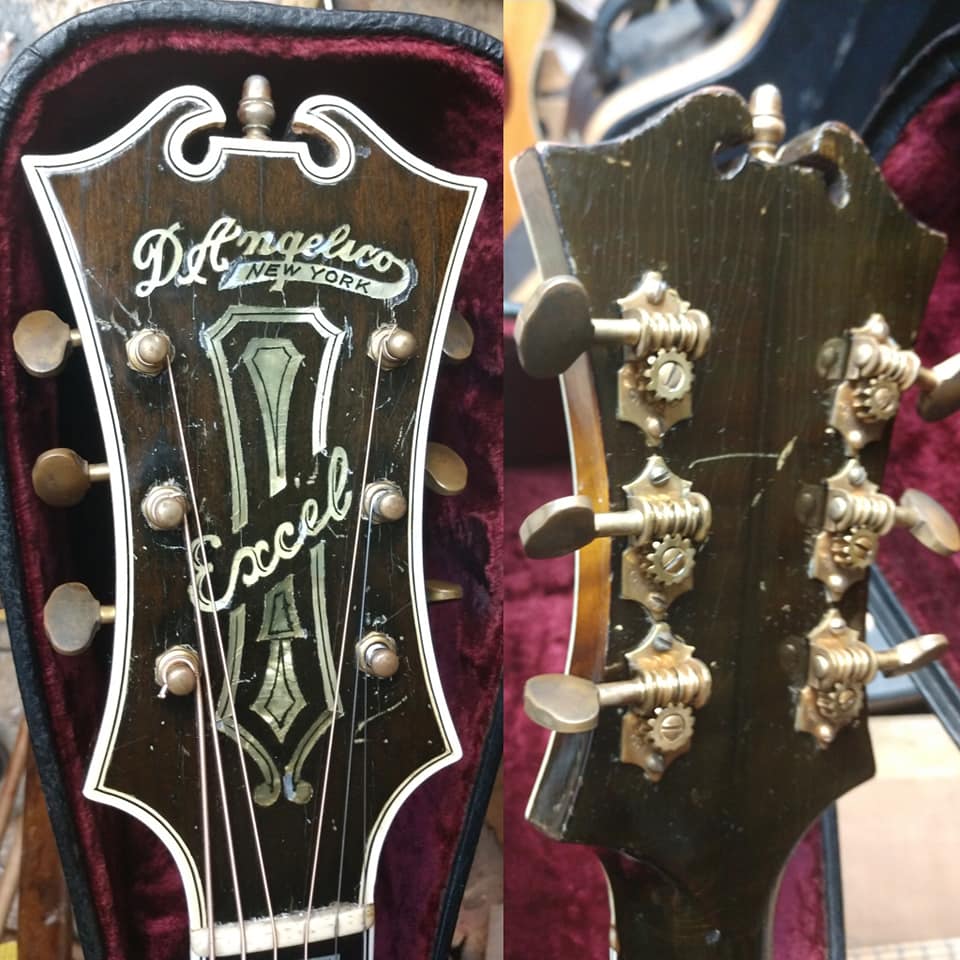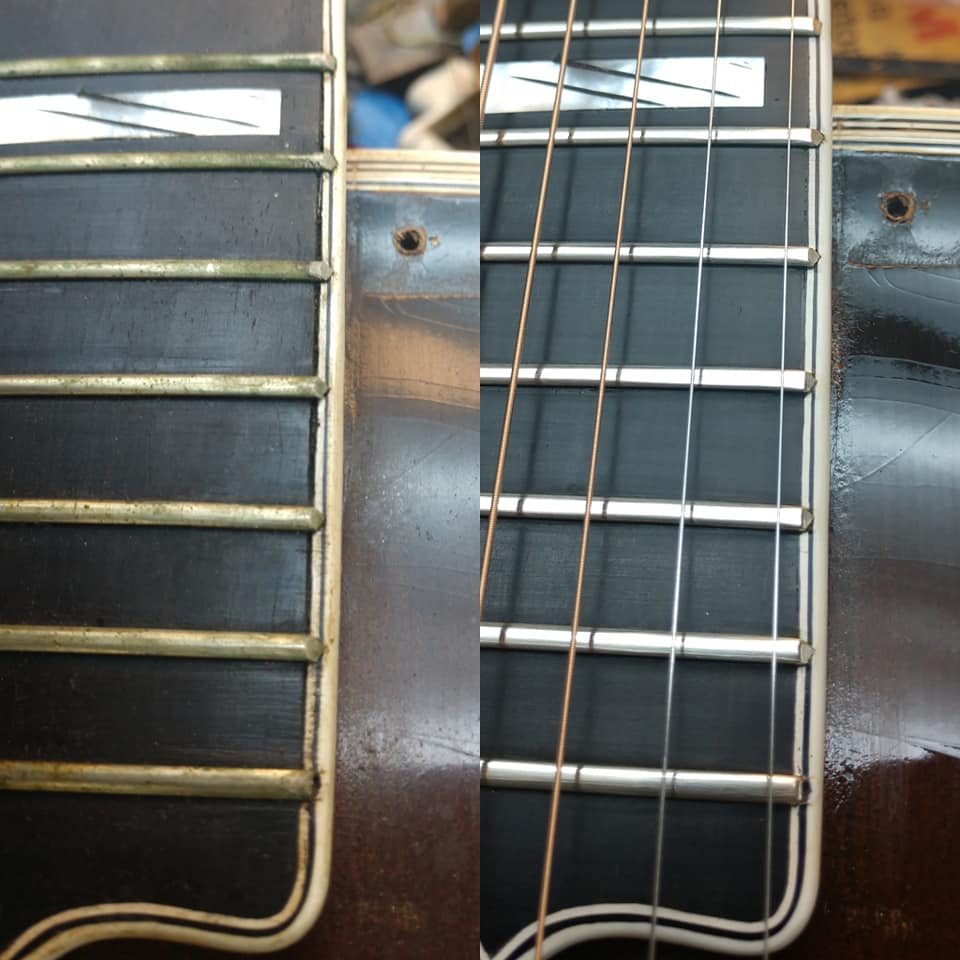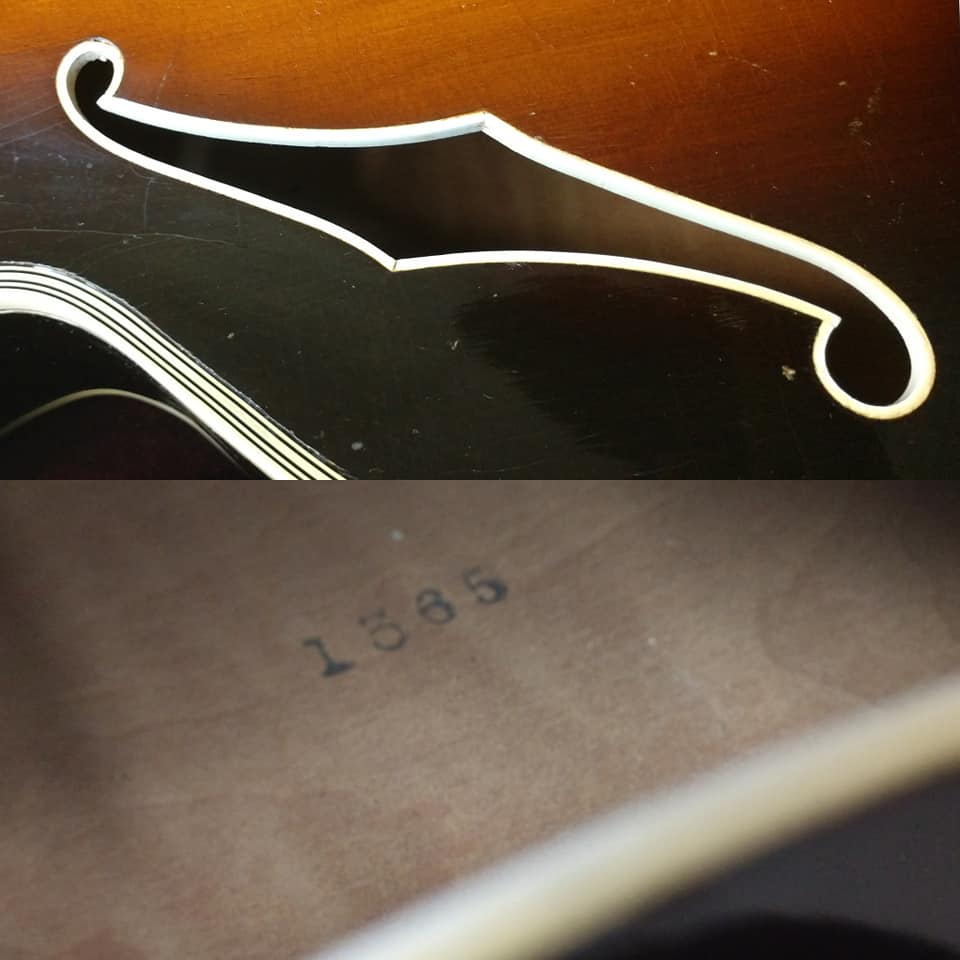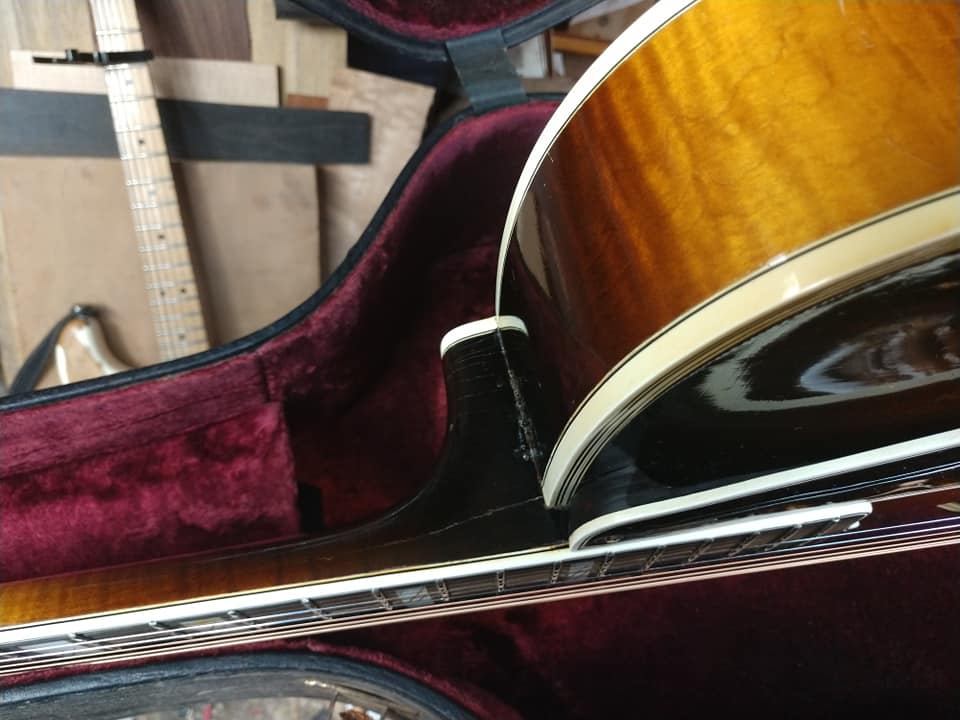
Thanks to The Met Museum for the recommendation to restore this vintage 1939 D’ANGELICO Excel. The original frets were corroded green and dented. I worked hard to remove the corrosion to save the original frets and did our micropolishing process of the frets/fingerboard. The procedure of micropolishing involves the frets being polished from 400 grit sand paper all the way up to 10,000 grit lens paper (which polishes telescope lenses). The entire idea is to make the surface area so glass-like the metal string can resonate a clear true note with intonation clarity. I always use the example of the wine glass filled with liquid and the player rubs the rim…and the friction of that motion makes a note. You can imagine if the rim was rough, it would not be as reflective to carry the note. The fingerboard binding separated and I reglued/filled the area to make it flush again. The tailpiece on the Excel models commonly breaks at the fold at the bottom of the hook in area. To reattach the tailpiece bracket we did a brazing process to heat the pieces back together flush. The amount of heat required for this is enough to turn the brass tailpiece area red hot. The last step to restore the tailpiece is to use acid to blacken/patina it to match the age of the guitar’s hardware. The pickguard had a foggy texture to it and I hand buffed it for 2 hours to get it clean and shinny. The sides of the guitar on the upper Low E side bout separated and I reglued/secured the area back into place. The final step was to hand buff the guitar clean of all grime, oiled/rebuilt the tuning keys, set up with 52-11 Petillo copper strings and refit the bridge base flush to the top. This is a priceless instrument and it’s always an honor to work on these. My Father Dr. Phil Petillo early on studied with John D’Angelico and after John’s passing finished his apprenticeship with John’s Godson, Jimmy DeSerio. At our shop we have documented journals, wood and blueprints/fixtures from John’s shop.
1938 D’Angelico Restoration